Mastering TextEditor in SwiftUI: Features, Limitations, and Tips

Sponsored
Sponsor This Blog
Connect with a targeted audience of iOS developers and Swift engineers. Promote your developer tools, courses, or services.
Learn More →One of the most commonly used views in iOS apps is an editable text view. It's a versatile element that can be used for various purposes: leave a comments on social media, create a note, or even write a code. SwiftUI has a basic view for long-form text editing — TextEditor. While it is not as powerful as UITextView, it is sufficient for most use cases.
In this article, we'll explore the basic features of TextEditor and how to extend it with additional functionality. This is the first article in a series on text editing in SwiftUI. Next, we'll cover more topics like text classification and creating your own machine learning model for text analysis. Text is not just symbols, right?
Basic requirements
Let's start with the basic requirements for text editing:
- Focus management. It's important to show the keyboard when the text editor appears and hide it when the user finishes editing;
- Characters limit. Sometimes you need to limit the number of characters in the text editor. For instance, in most cases X has a limit of 280 characters for tweets;
- Reading and editing mode. Read-only mode is useful for displaying text that can't be edited, but can be selected and copied.
Unlike Text, TextEditor doesn't support attributed strings or markdown. And we'll not cover it in this article.
Base configuration
Let's begin with the initial setup. TextEditor requires a binding to a string:
import SwiftUI

struct ContentView: View {

    @State private var text = "It was a great day!"

    var body: some View {
        TextEditor(text: $text)
    }
}
Starting from iOS 18.0, text selection can be handled directly. This feature can be useful for offering text suggestions. For instance, you can suggest to change text with LLM like GPT-4o: adjust the length, change reading level, etc.
@State private var textSelection: TextSelection?

TextEditor(text: $text, selection: $textSelection)
  .onChange(of: textSelection) {
      guard let textSelection else {
          return
      }
      switch textSelection.indices {
      case .selection(let range):
        print(text[range])
      case .multiSelection(let rangeSet):
          rangeSet.ranges.forEach { range in
              print(text[range])
          }
      @unknown default:
          break
      }
  }
To change the background color, hide the scroll content background and apply a new color:
TextEditor(text: $text, selection: $textSelection)
  .scrollContentBackground(.hidden)
  .background(.gray.tertiary)
Also, based on design of your app, you can change the font, text color, and line spacing:
TextEditor(text: $text, selection: $textSelection)
  .font(.title3)
  .foregroundStyle(.primary)
  .lineSpacing(4)
Depending on text content, you can change the keyboard:
TextEditor(text: $text, selection: $textSelection)
  // Change a keyboard layout based on types
  .keyboardType(.default)
  // Change return key type
  .submitLabel(.return)
By default, iOS automatically changes the text input with autocapitalization and autocorrection. It may be annoying sometimes, for example, when you enter an address or technical terms. You can control this behavior:
TextEditor(text: $text, selection: $textSelection)
  .textInputAutocapitalization(.sentences)
  .autocorrectionDisabled(true)
Focus State
The focused modifier allows us to manage the focus state of the text editor. For example, if you may show the keyboard on appearance or hide it on saving action.
struct ContentView: View {

    @State private var text = "It was a great day!"
    @State private var textSelection: TextSelection?
    @FocusState private var isFocused: Bool

    var body: some View {
        TextEditor(text: $text, selection: $textSelection)
            .focused($isFocused)
            .onAppear {
                isFocused = true
            }
    }
}
Characters limit
There is no built-in way to limit the number of characters in TextEditor. But we can use onChange modifier to check the text length and truncate it if it exceeds the limit:
TextEditor(text: $text, selection: $textSelection)
  .characterLimit($text, to: 200)

extension View {

    func characterLimit(_ text: Binding<String>, to limit: Int) -> some View {
        onChange(of: text.wrappedValue) {
            text.wrappedValue = String(text.wrappedValue.prefix(limit))
        }
    }
}
This code is simple and requires no additional states or bindings. We can track the text count and show ProgressView to indicate the remaining characters:
VStack(spacing: 0) {
    ProgressView(value: Float(text.count), total: 200)
    TextEditor(text: $text, selection: $textSelection)
}
Find and replace
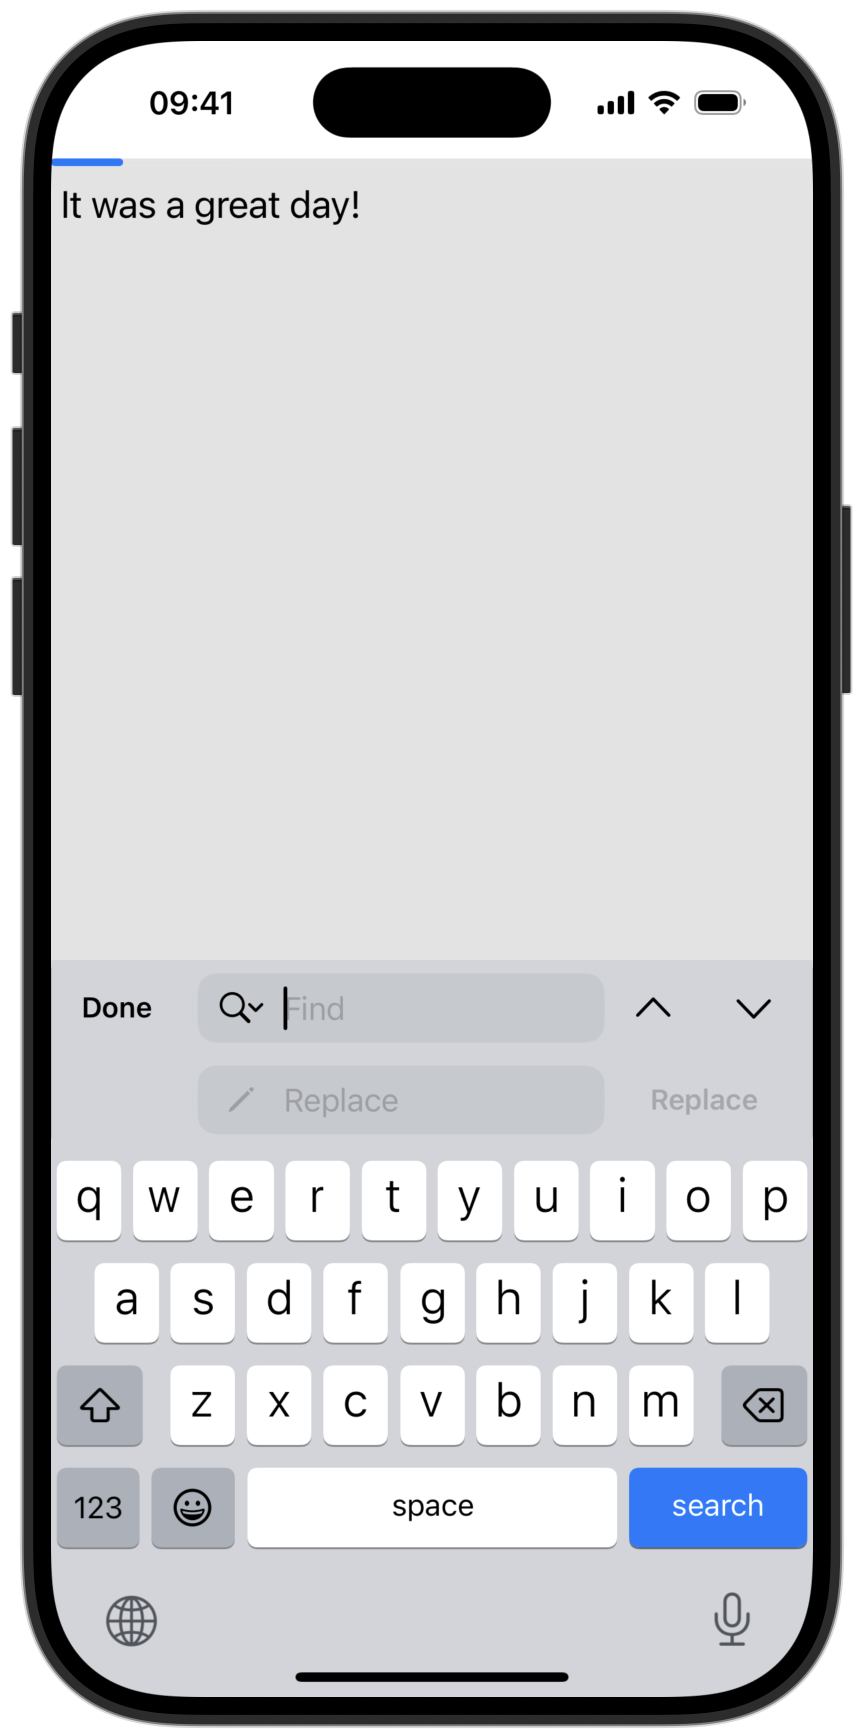
One of specific modifiers for text editing is findNavigator. It allows you to add find and replace features to the text:
@State private var findNavigatorIsPresented = false

var body: some View {
    TextEditor(text: $text, selection: $textSelection)
      .findNavigator(isPresented: $findNavigatorIsPresented)
}
To enable this interface, we can add a toolbar item with a toggle:
TextEditor(text: $text, selection: $selection)
    .toolbar {
        ToolbarItemGroup(placement: .keyboard) {
            Toggle(isOn: $findNavigatorIsPresented) {
                Label("Find and replace", systemImage: "magnifyingglass")
            }
        }
    }
Optionally you can disable it for some cases:
TextEditor(text: $text, selection: $selection)
  // Disables find and replace features
  .findDisabled(true)
  // Disables only replacing feature
  .replaceDisabled(true)
These modifiers must be added before the .findNavigator modifier. Otherwise, they will have no effect.
Reading and editing mode
That's what stops me from using TextEditor sometimes — it doesn't have a built-in way to disable editing. The first thing that comes to mind is to show Text instead of TextEditor in read-only mode. It may be useful but users can select only the full text, not a part of it. An other way to disable editing is to use .constant(text) binding. However, the keyboard and cursor still appear when tapping, which is undesirable.
Here is a workaround with Introspect framework:
TextEditor(text: $text, selection: $textSelection)
  .introspect(.textEditor, on: .iOS(.v18)) { textView in
      textView.isEditable = false
  }
Apple Intelligence and Writing Tools
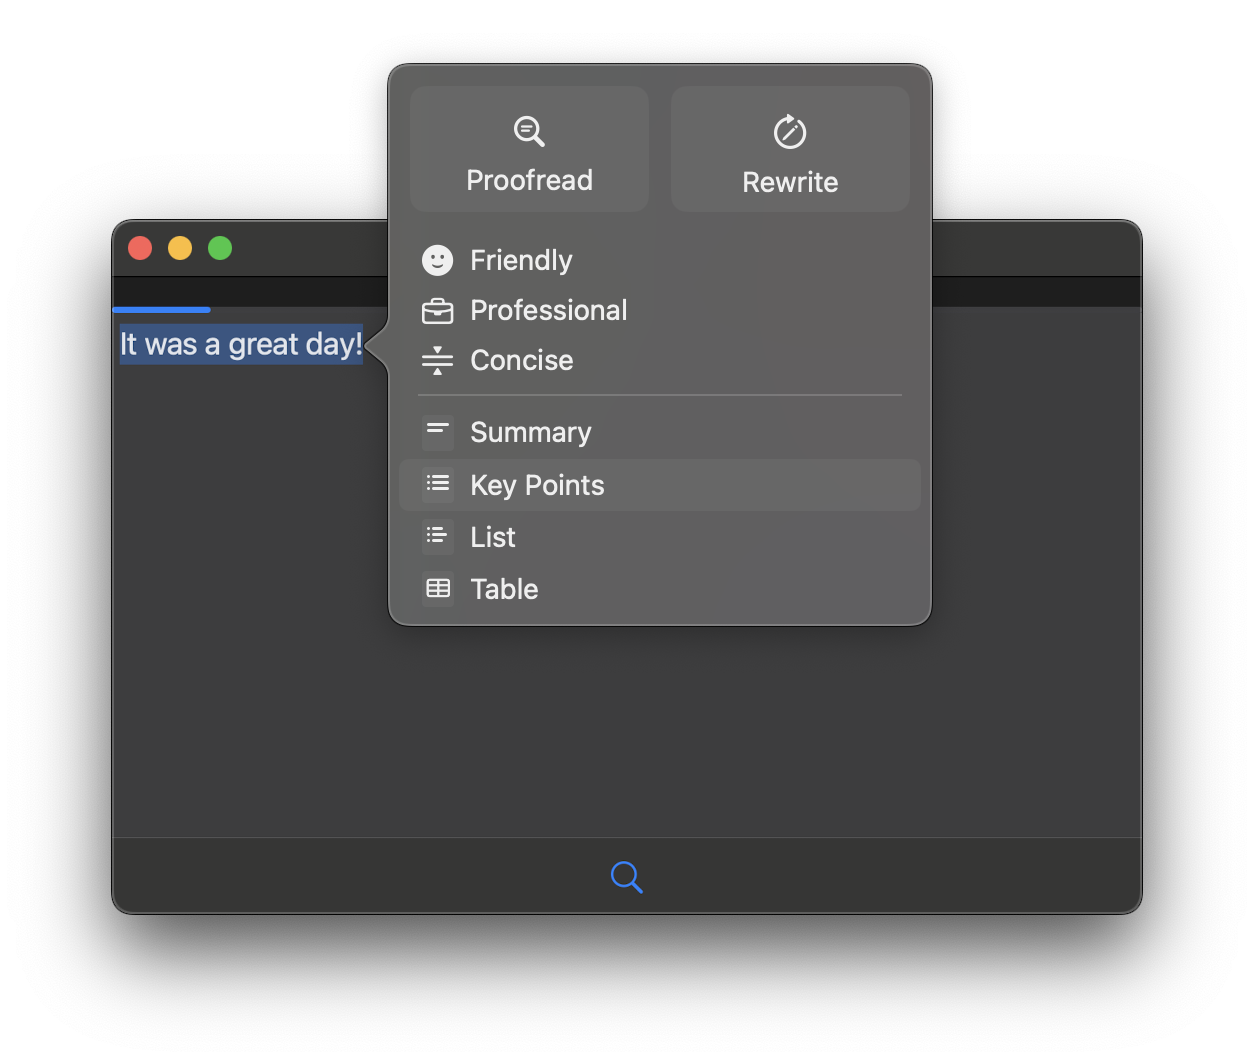
Apple introduced a feature called Writing Tools. It's a set of tools that help users to write smarter:
TextEditor supports Writing Tools by default. There is a new writingToolsBehavior modifier that allows you to change the behavior. For example, .complete behavior completes current phrase.
TextEditor(text: $text, selection: $textSelection)
  .writingToolsBehavior(.complete)
I didn't find a way to run Writing Tools in the simulator, and my iPhone 14 Pro doesn't support it. So I just ran the example on macOS:

TextEditor alternatives
Thinking about alternatives to TextEditor, we can consider:
TextFieldwith vertical axis (iOS 16.0+);- Third-party frameworks like RichTextKit or STTextView;
UITextViewviaUIViewRepresentable.
There is no perfect solution; choose the one that best fits your requirements. When writing code, I aim to achieve flexibility without adding unnecessary complexity. While it can be challenging at times, the results are always rewarding.
What's next?
In this article, we've covered the basic features of TextEditor. You can find a final version of the code in TextEditorExample repository. But it just a beginning. What's really interesting is a meaning of the text. What users want to say? What's the sentiment? How to classify the text? We'll cover these topics in the next articles. Stay tuned!
