Sponsored
Glaze by Raycast
Desktop apps, reimagined by you. Create software for you and your team — it lives on your Mac and connects to your files, tools, and hardware.
Learn More →In a previous post we talked about Natural Language framework. It's a powerful tool for text analysis, but it currently supports only a limited set of languages. In this post, we will learn how to create our own machine learning model for sentiment analysis for new languages. Without a single line of code. Well, almost 😏.
Using Create ML
Create ML is a tool that helps you train models for image classification, object detection, sound or text classification, etc. If you have Xcode installed, you already have Create ML, it's a part of the Xcode app bundle. You can find it in the Xcode menu -> Open Developer Tool -> Create ML. The final result of working with Create ML is a Core ML model. It can be integrated into your app and run on the simulators or the devices.
Create ML has different project templates. There are two types of the templates for text:
- Text classification. Identifying the main topic, theme, or sentiment in text;
- Word tagging. Splitting text into classified phrases or words based on their context.
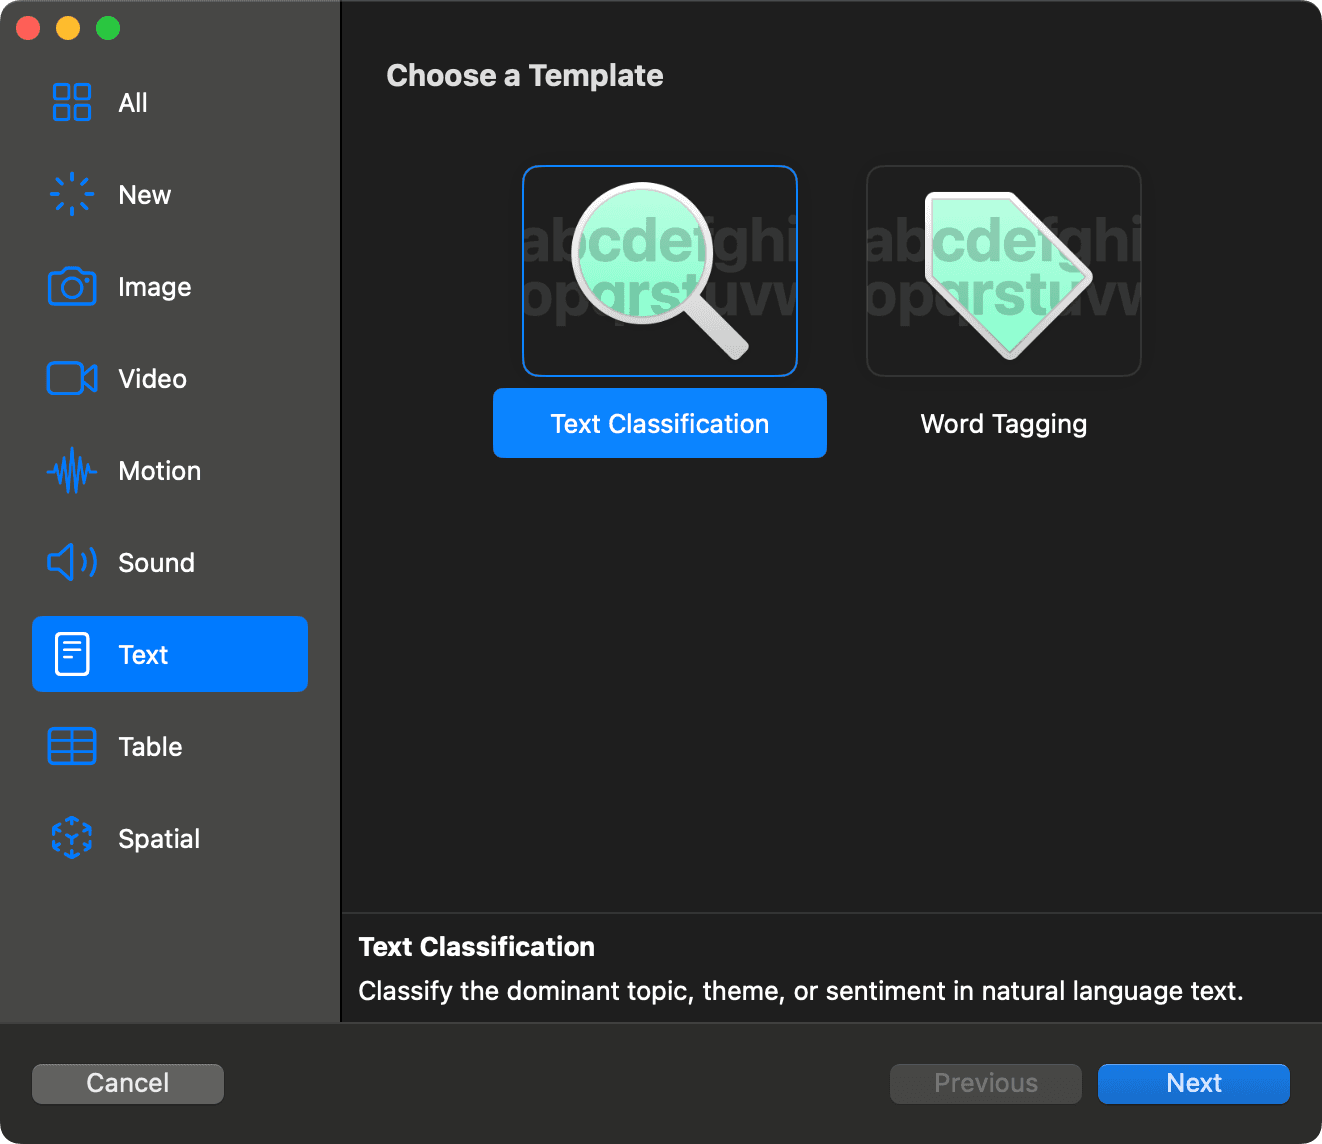
We'll create a sentiment analysis model for Russian and Kazakh languages. Let's choose the Text classification template and call it SentimentTextClassifier. You can also add author name, license and description for your model. The next step is to choose a dataset. You can use your own dataset or download one from the internet. For example, you can find sentiment datasets on Kaggle or HuggingFace. I didn't find good datasets for my languages, so I created my own by generating sample texts with ChatGPT. It's a JSON file with the following structure:
[
    {
      // means 'Today was a wonderful day, I managed to do everything I planned!'
      "text": "Сегодня был замечательный день, я успел всё, что запланировал!",
      "label": "positive"
    },
    ...
    {
      // means 'It was an ordinary day at work, nothing special happened.'
        "text": "На работе был обычный день, без особых событий.",
        "label": "neutral"
    },
    ...
    {
      // means 'At work, I was blamed for something I didn't do.'
      "text": "Жұмыста мені жасамаған іске кінәлады.",
      "label": "negative"
    }
]
Also, you can use CSV files or use matching folders with text files:
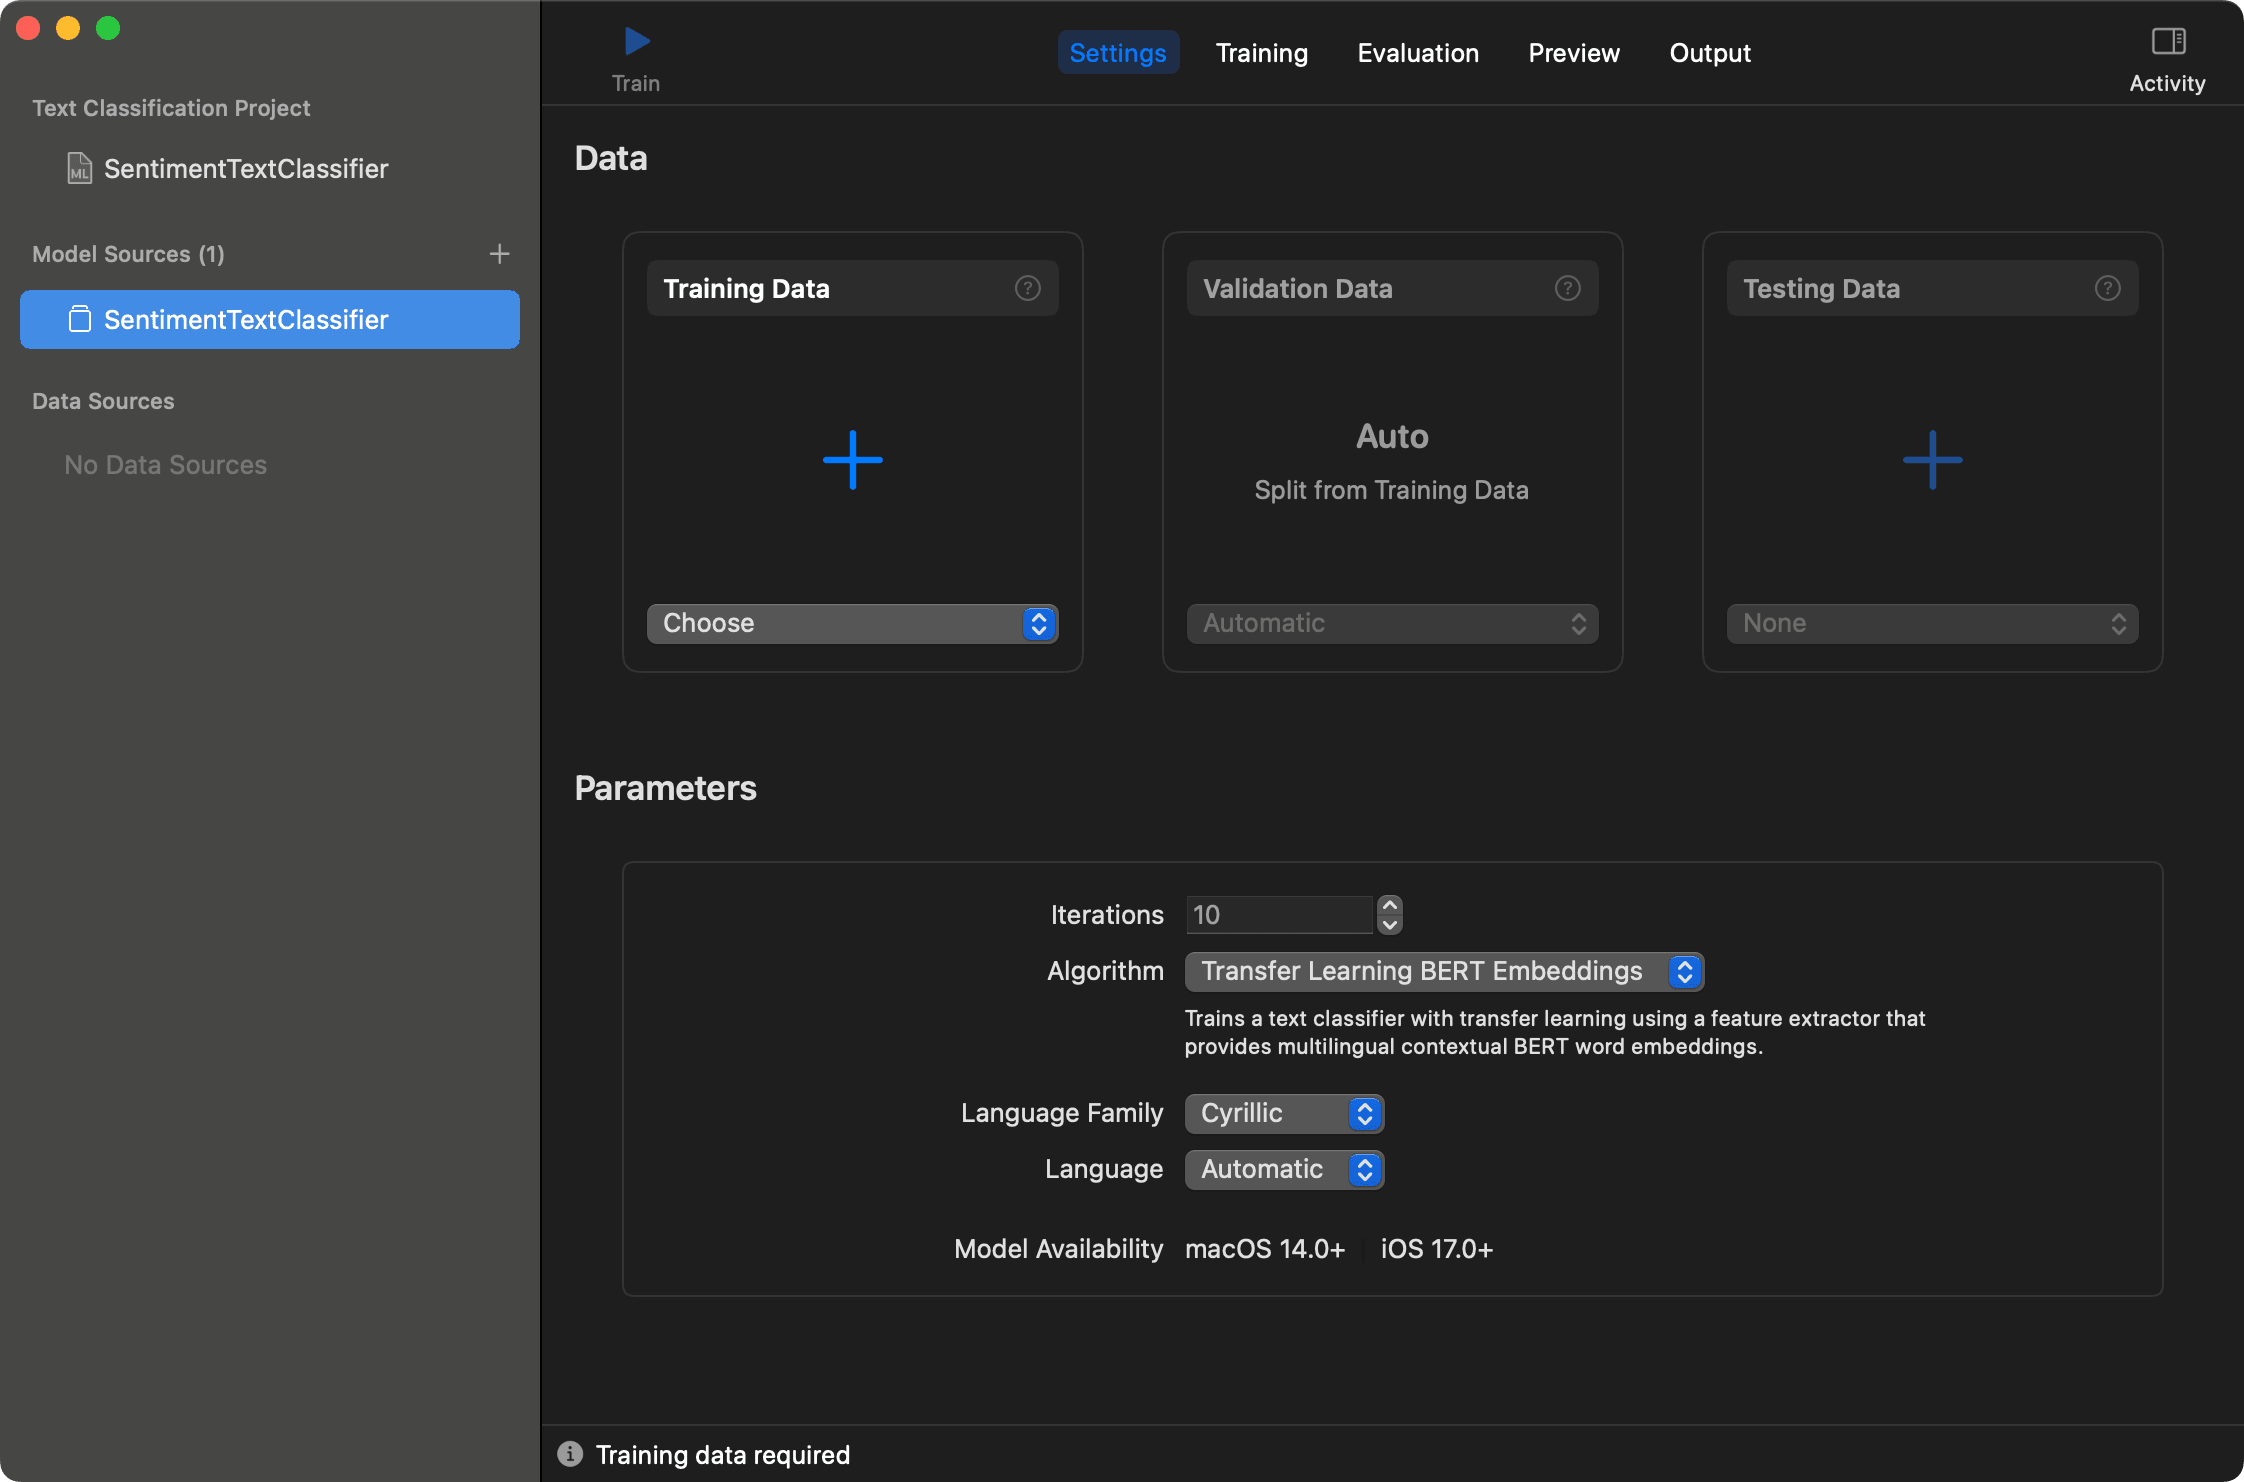
Optionally, you can split your dataset into training and validation parts. If you leave the validation data empty, Create ML will do it for you.
The last step is to choose the algorithm. Create ML supports different algorithms for text classification:
- Maximum entropy;
- Conditional random field;
- Transfer learning static embeddings;
- Transfer learning ELMo embeddings;
- Transfer learning BERT embeddings.
The only algorithm that supports multilingual models is BERT embeddings. It's a powerful model that can be used for a wide range of tasks. In two words, it's a model that learns bi-directional representations of text to significantly improve contextual understanding. BERT embedding models are available from iOS 17.0+ deployment target.
Next, we'll choose the language family. In our case, it's Cyrillic for Bulgarian, Kazakh, Russian, and Ukrainian languages. Now we're ready to go, just press the Train button.
After training, you can see the training results of the model. It shows the training and validation accuracy:
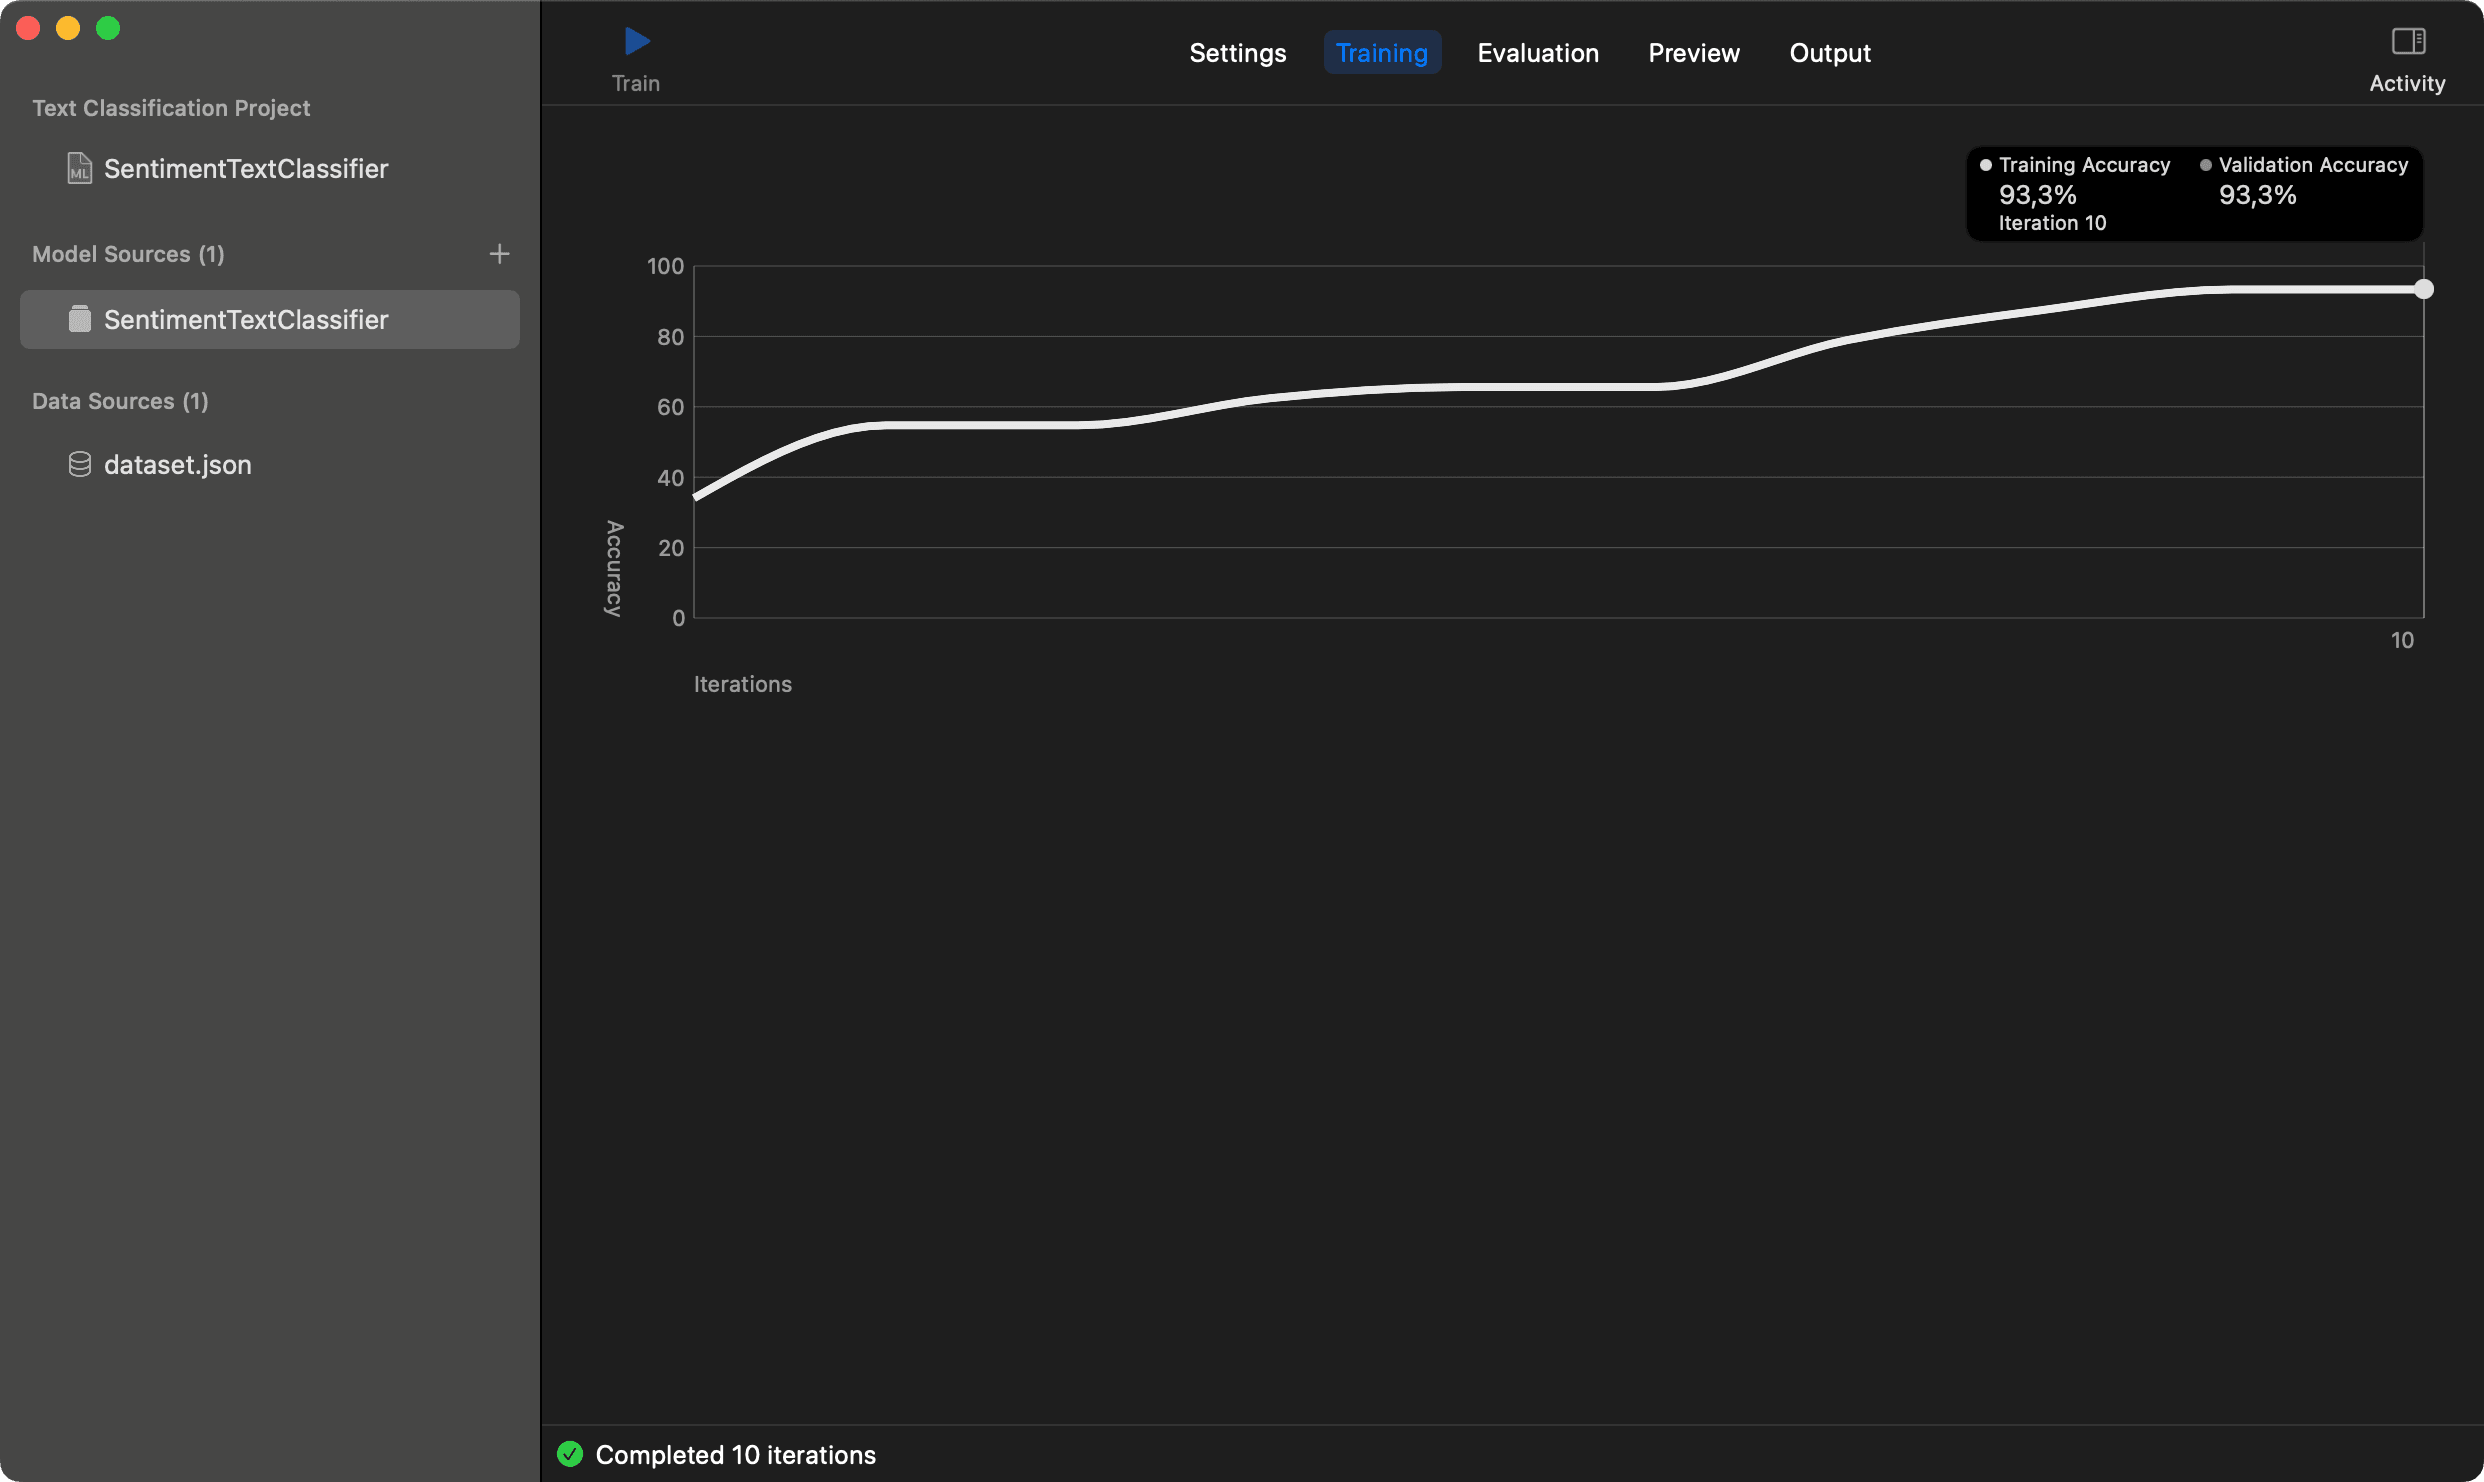
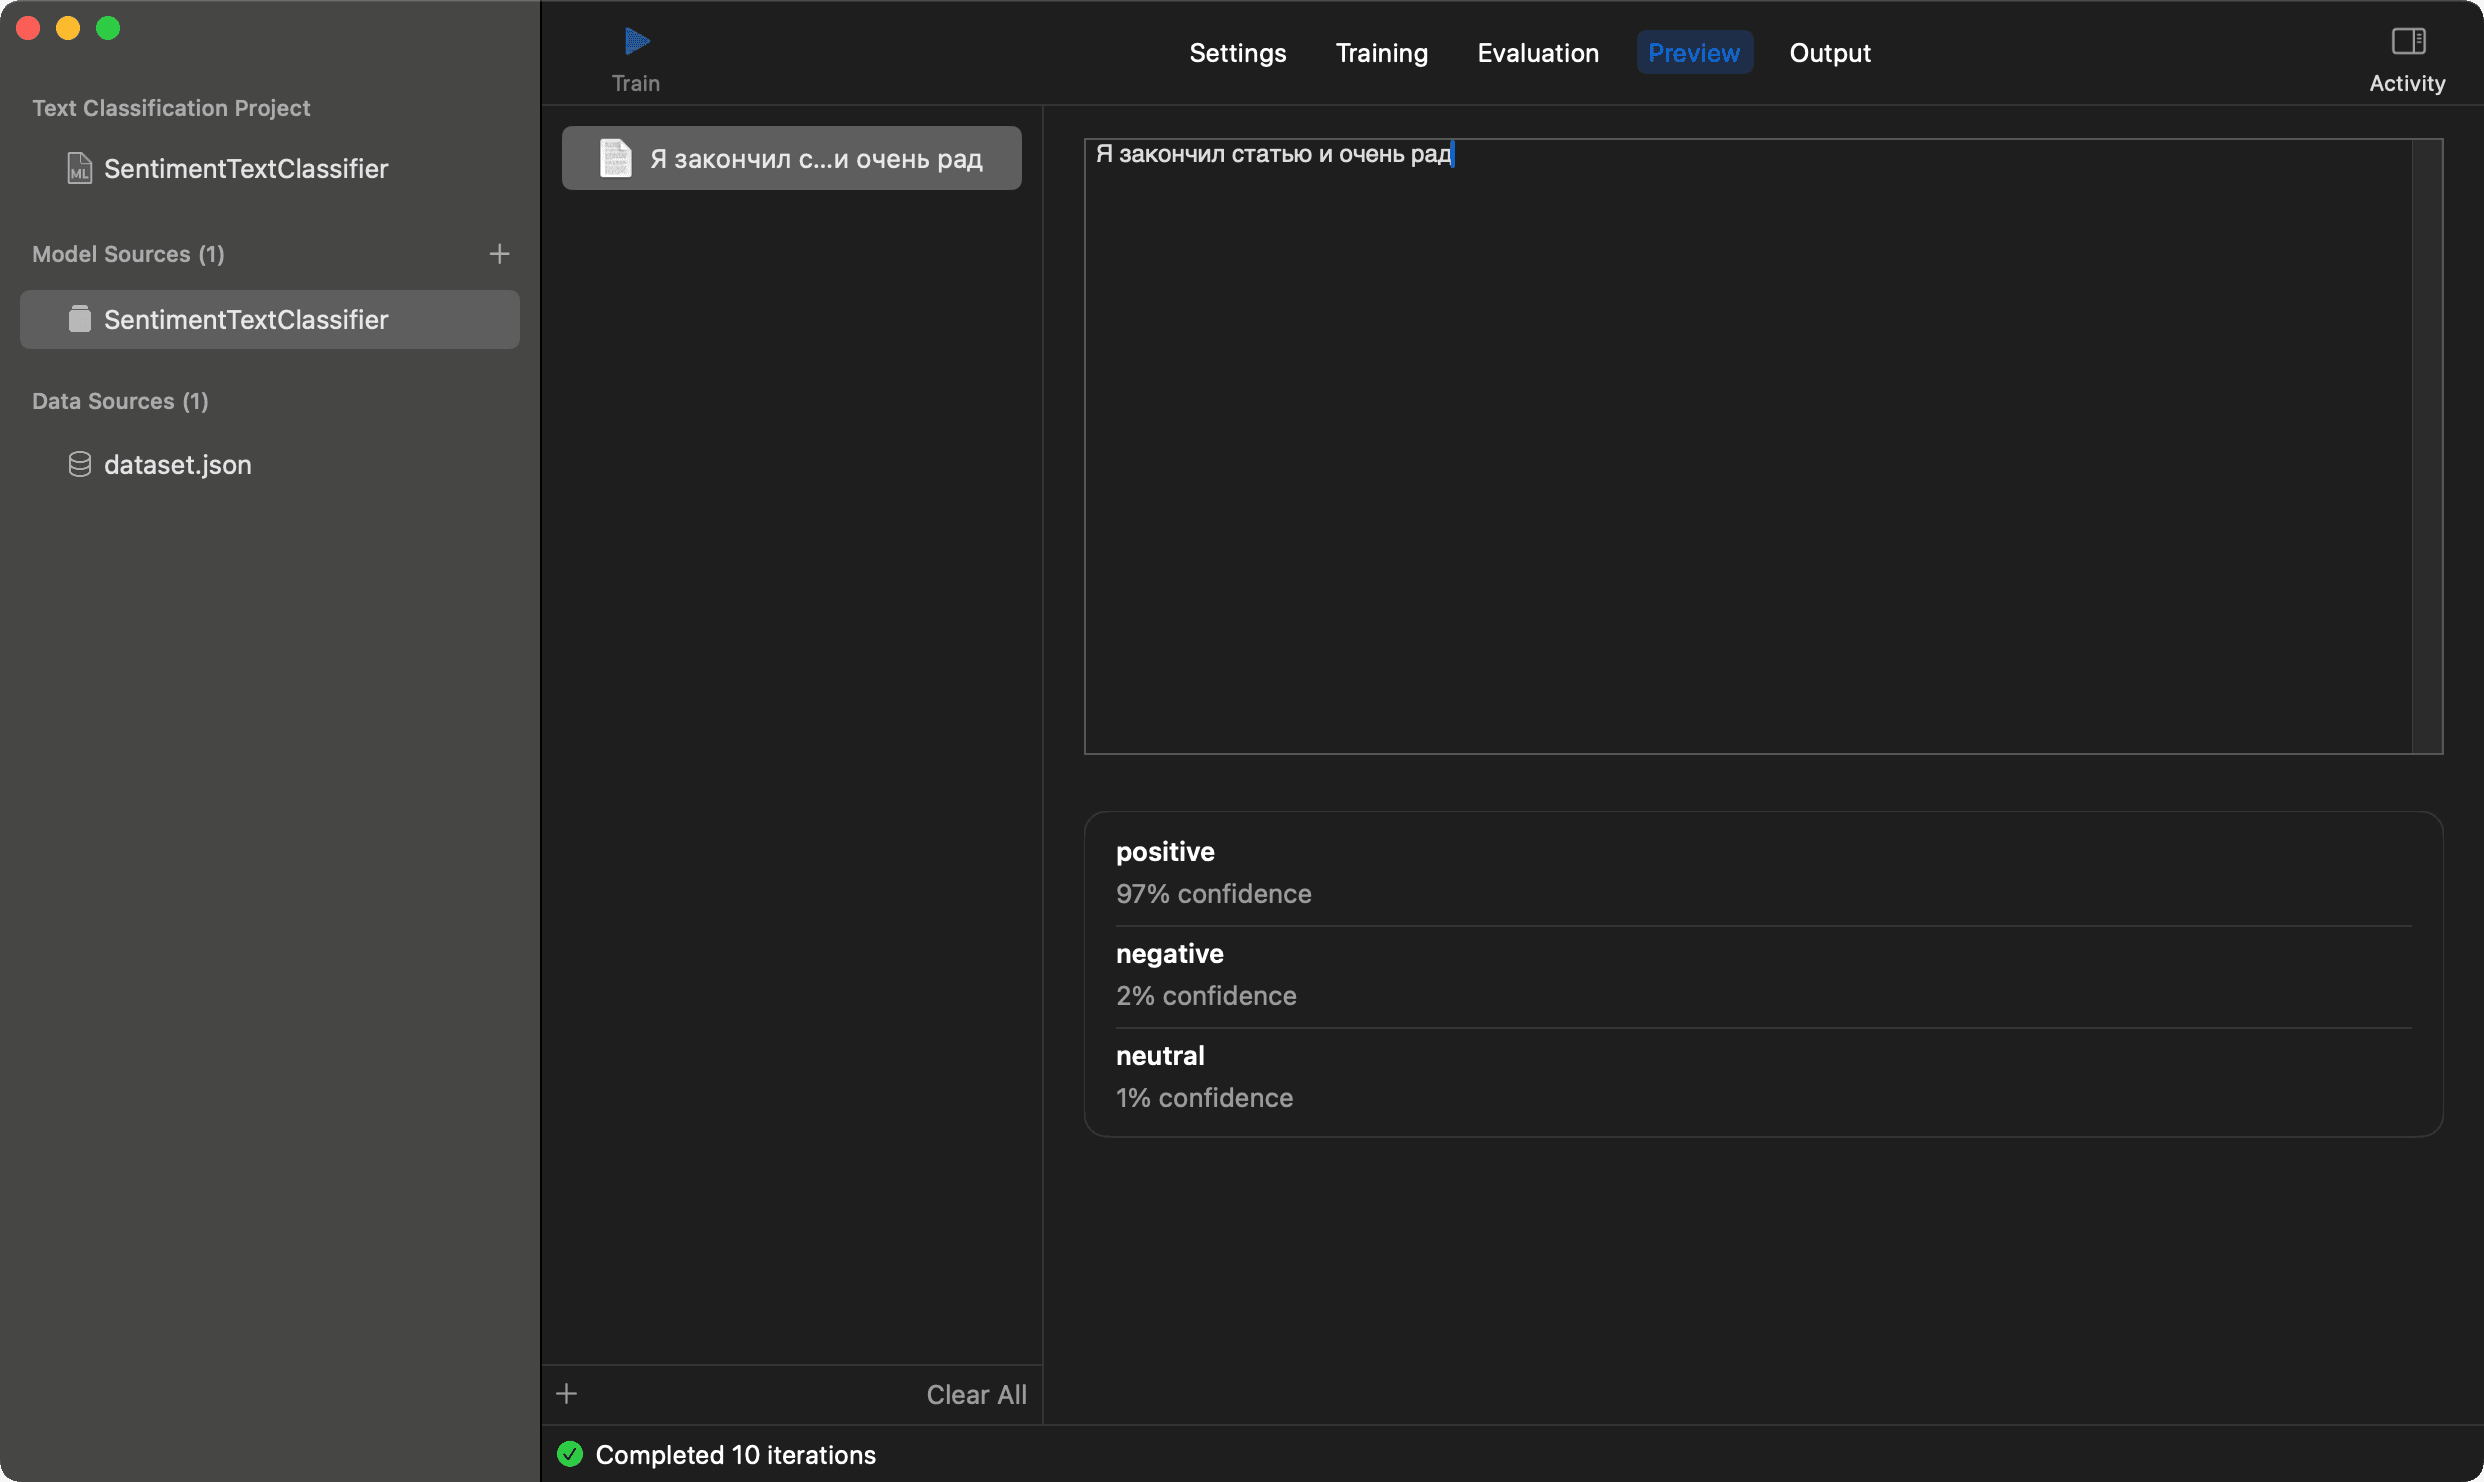
Good dataset quality is crucial for the model. If you have a small dataset, you can use data augmentation. It's a technique that generates new data from existing data. For example, you can replace words with synonyms, or change the order of words in the sentence. My accuracy is good enough, so let's check the model in Preview tab. I'll use an example: "I finished the article and I'm so happy". Here is the result for Russian language:
And the same example for Kazakh language:
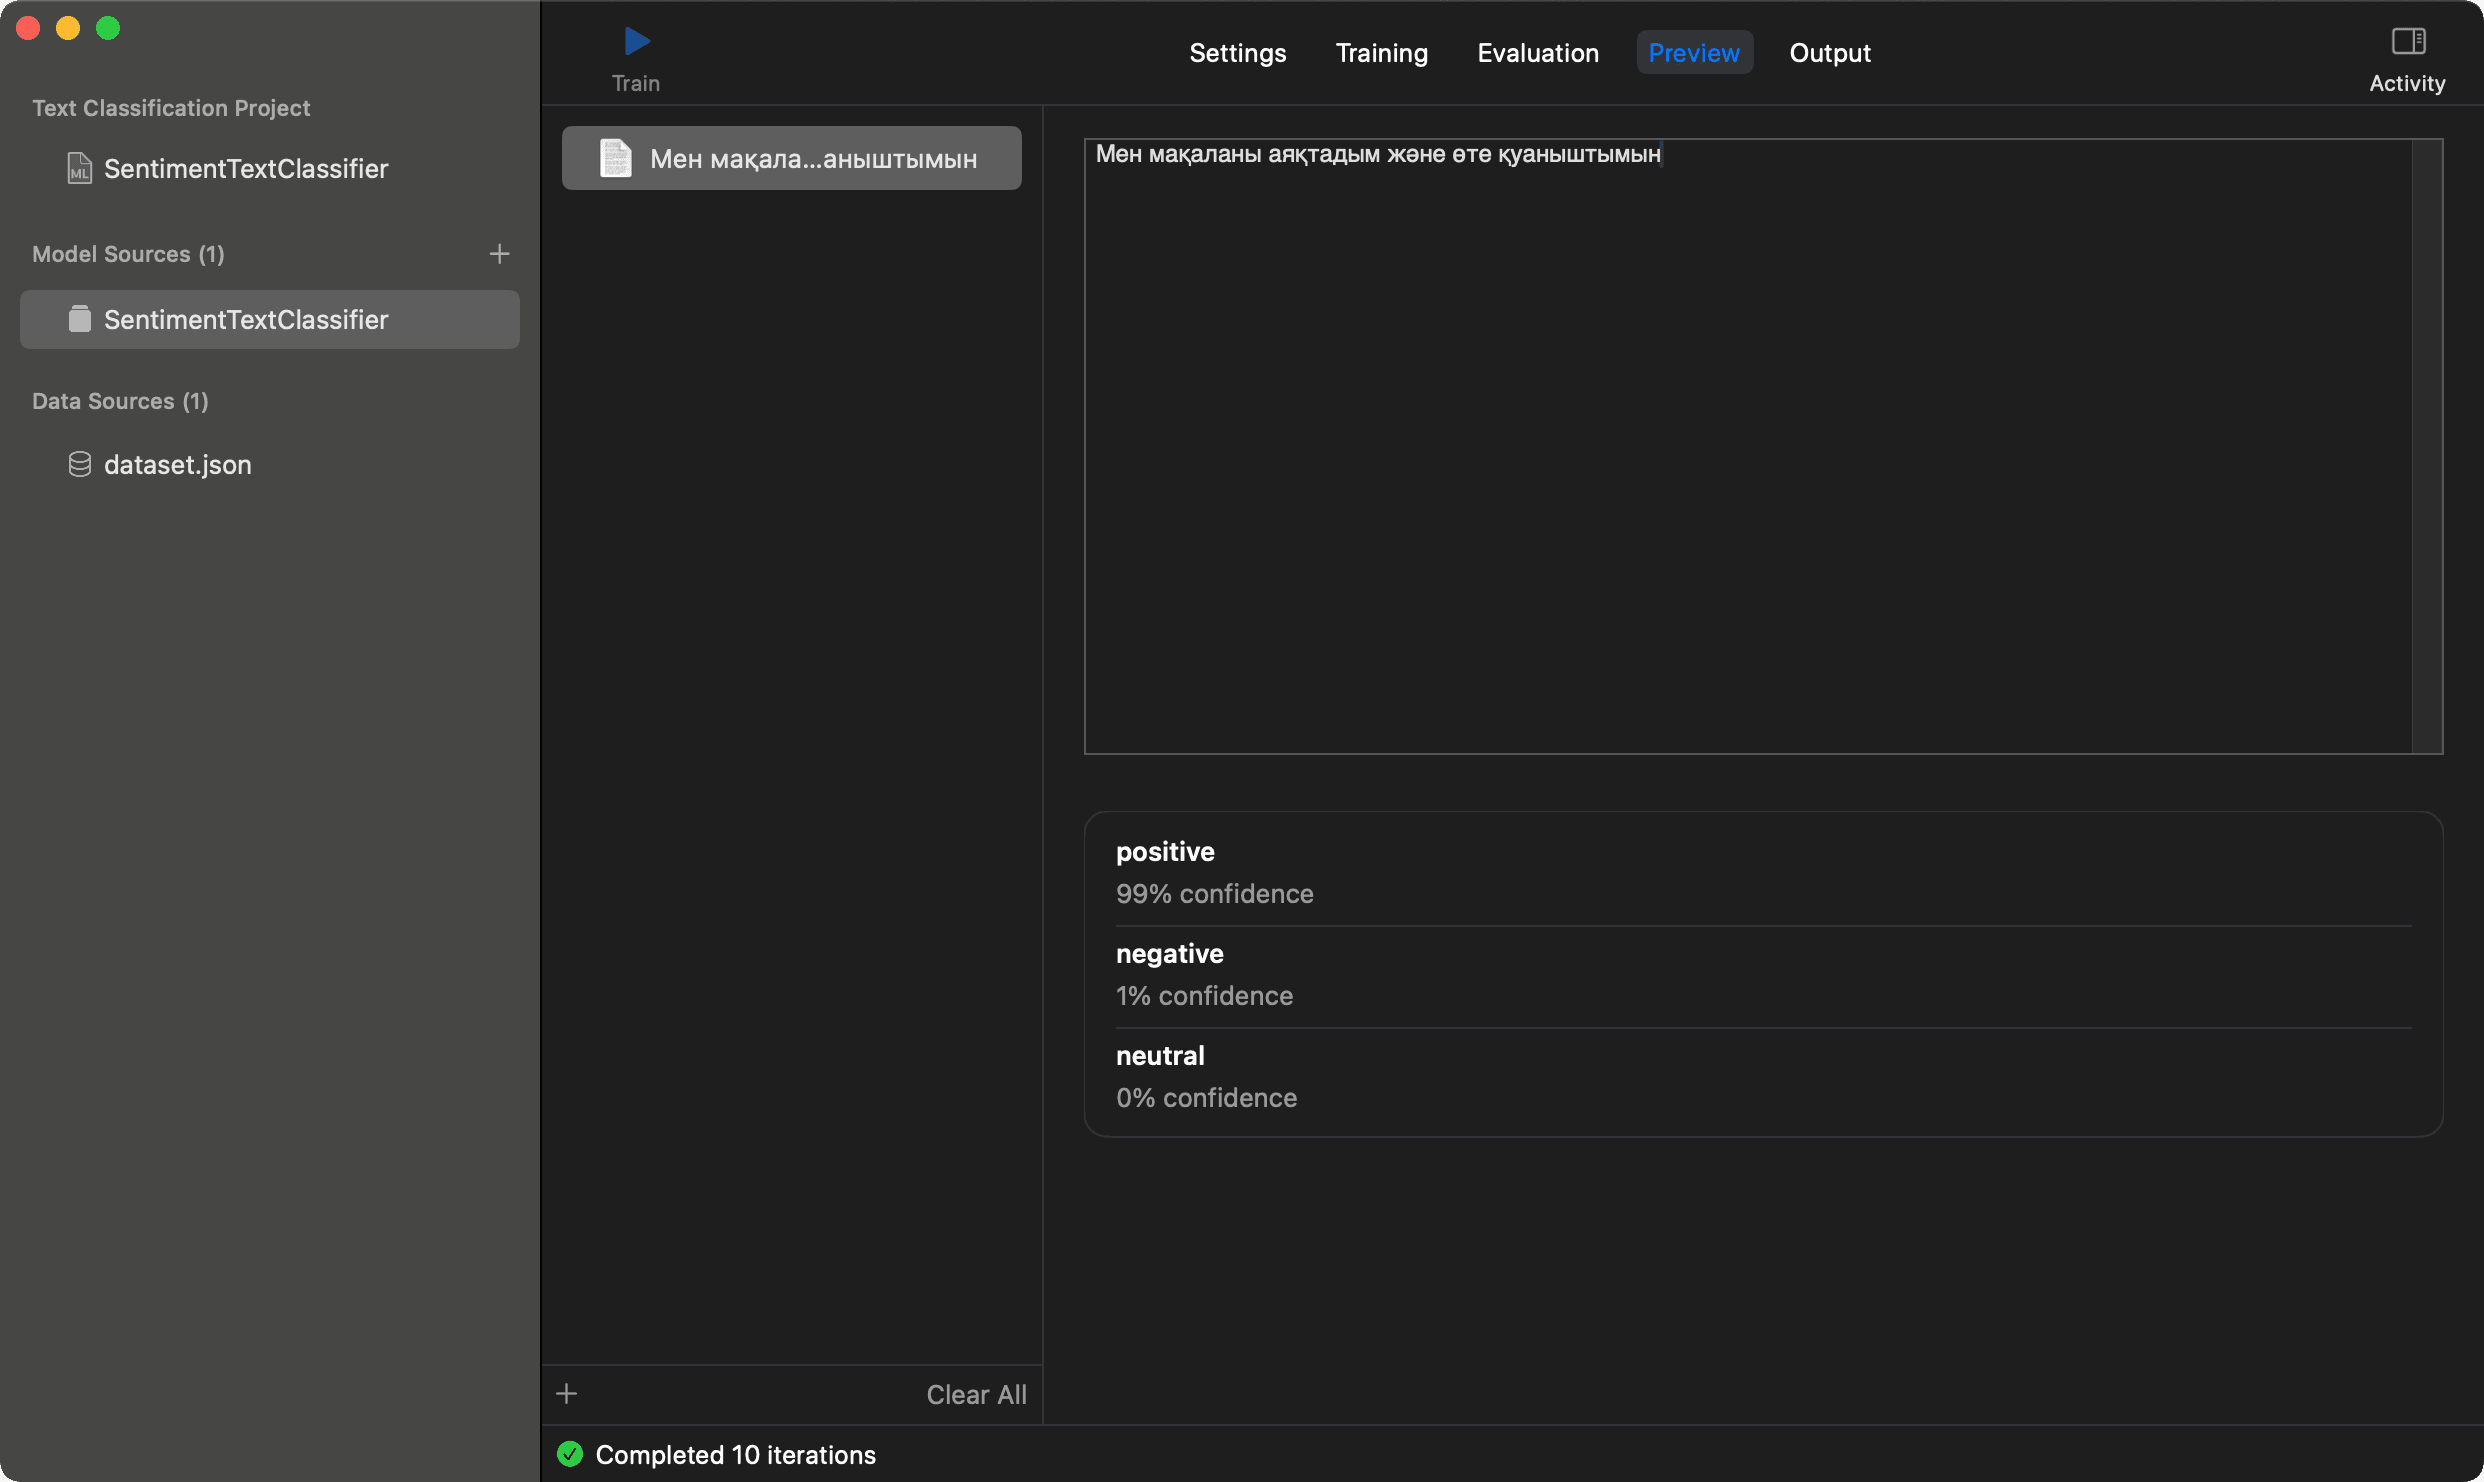
It's definitely a positive sentiment, and the model works as expected. The last step is to save the model. In Output tab you can theck the model parameters and save it with Get button:
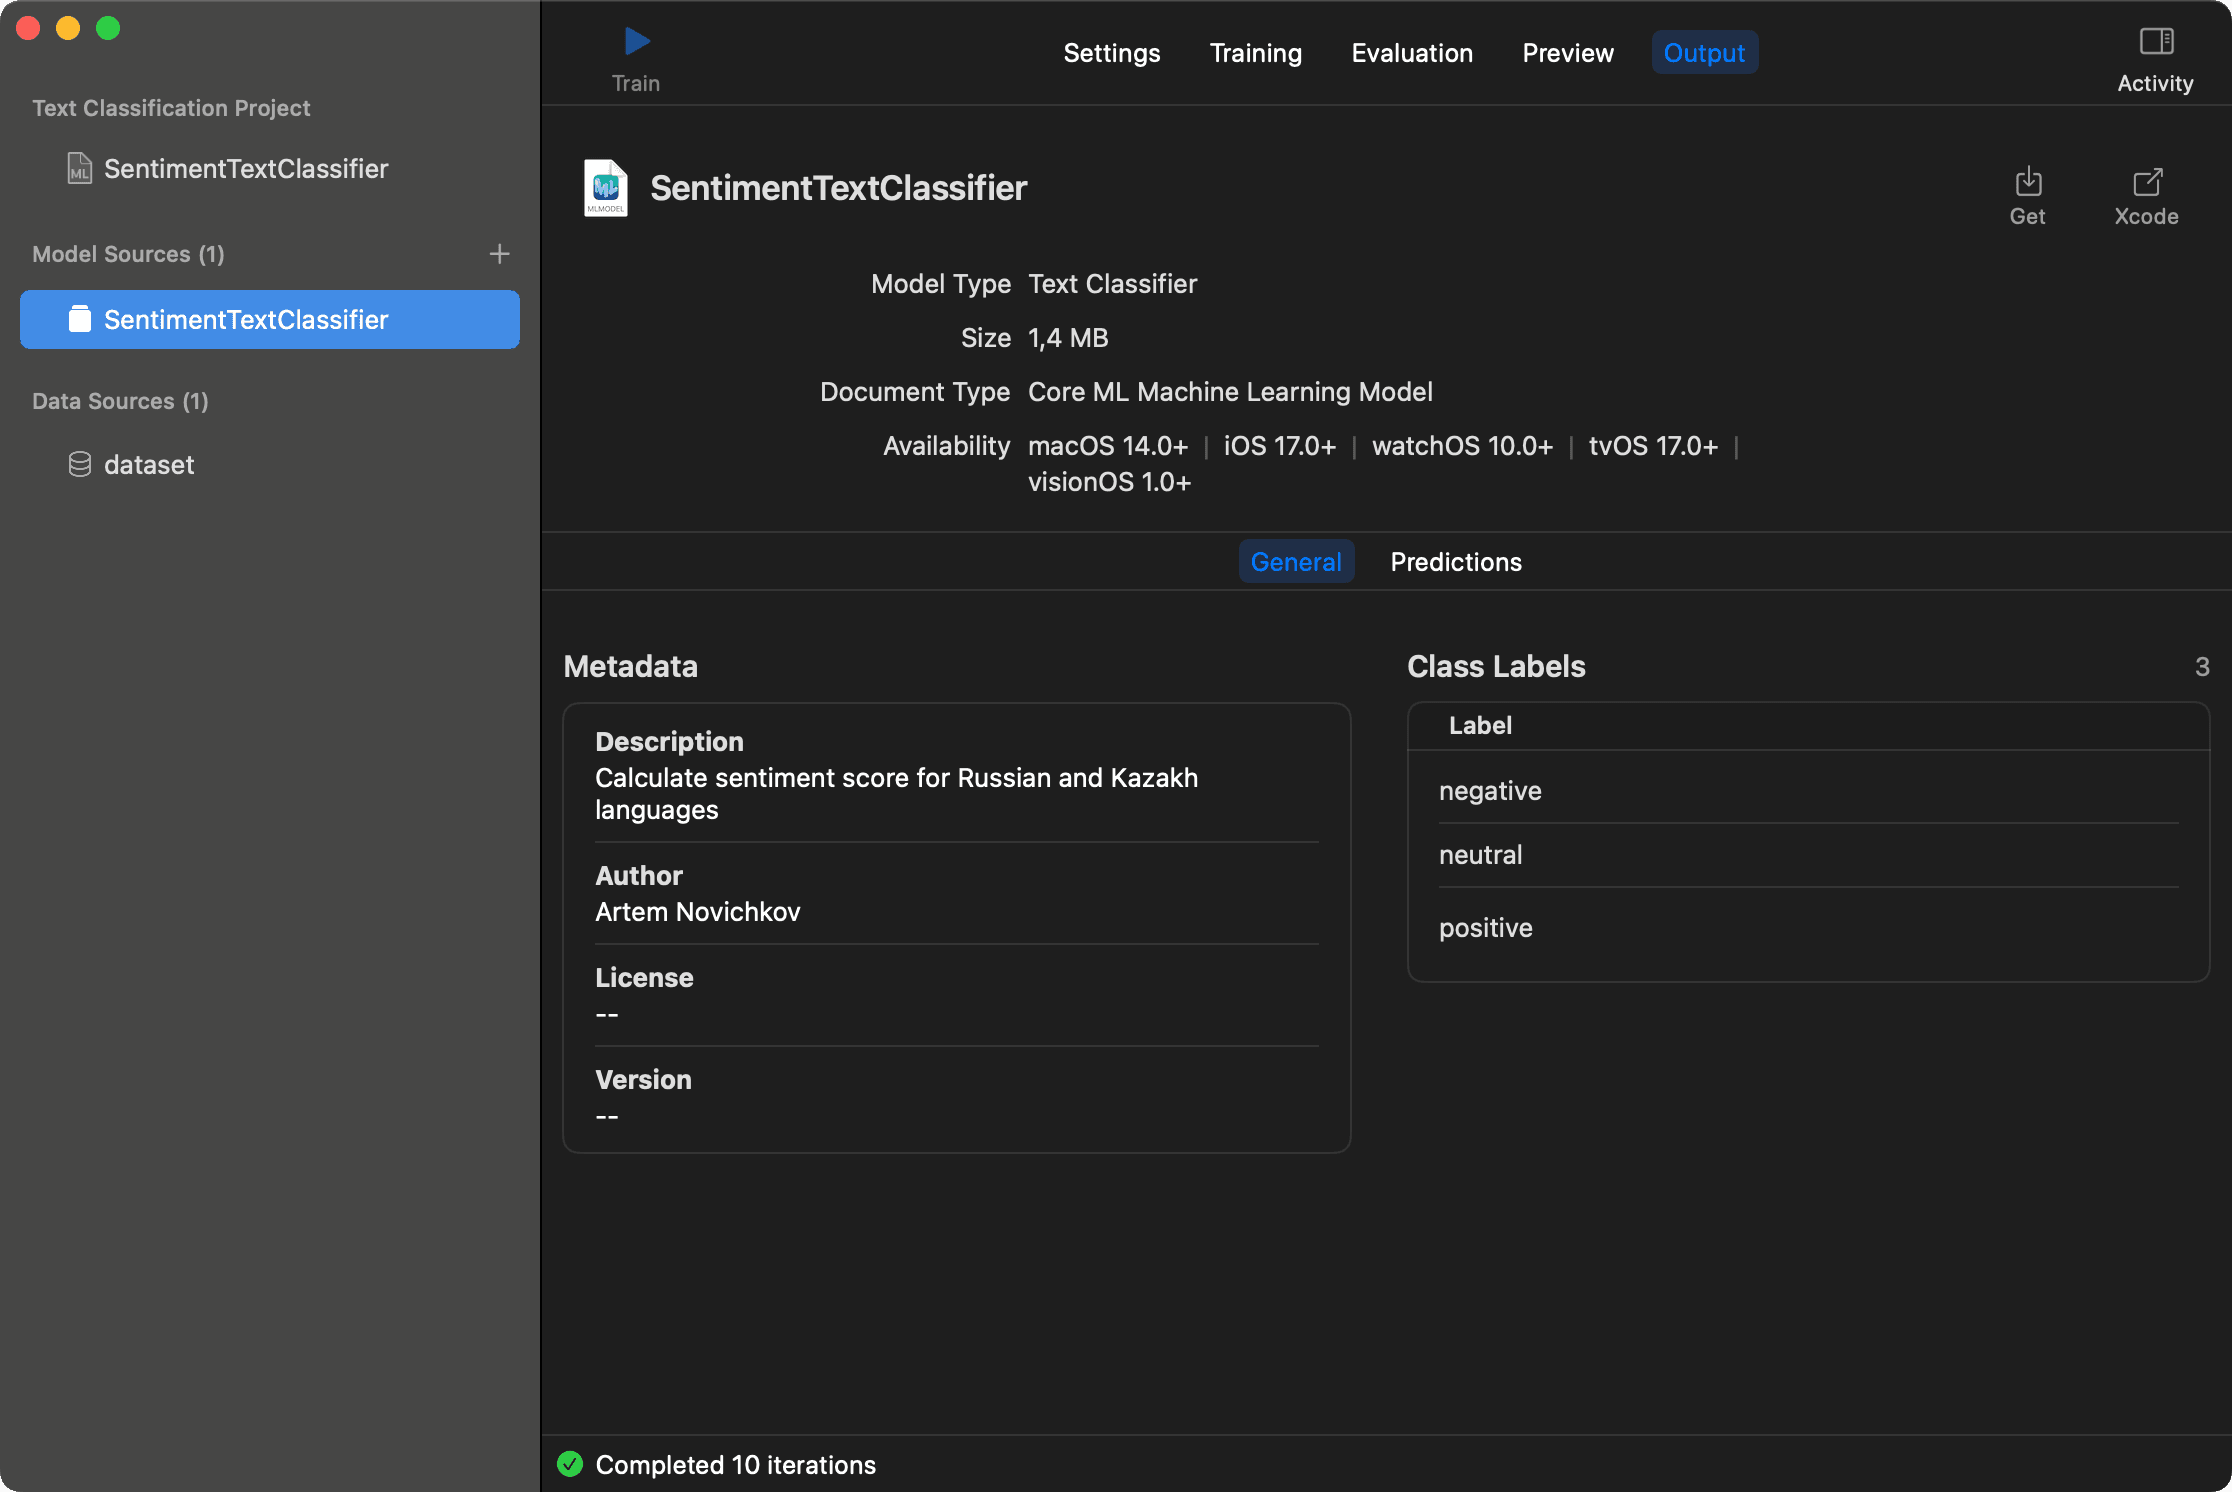
We get SentimentTextClassifier.mlmodel file which can be integrated into your app. The dataset size is 46 Kb, and the model size is 1.4 Mb, if you're wondering.
Integrating Core ML model in iOS app
Integration is very simple. Just drag and drop the .mlmodel file into your Xcode project. Xcode will automatically generate a Swift class with a convenience interface. Here is the code for sentiment analysis:
enum Sentiment: String {

    case positive = "positive"
    case neutral = "neutral"
    case negative = "negative"
}

func sentiment(for text: String) -> Sentiment? {
    do {
        let classifier = try SentimentTextClassifier()
        let output = try classifier.prediction(text: text)
        return Sentiment(rawValue: output.label)
    }
    catch {
        print(error)
        return nil
    }
}
Futhermore, you can use Preview right in Xcode, just select the imported model and tap Preview tab.
Speed of the model is also important. You can check the performance of the model in Performance tab. It shows the timings for different devices:
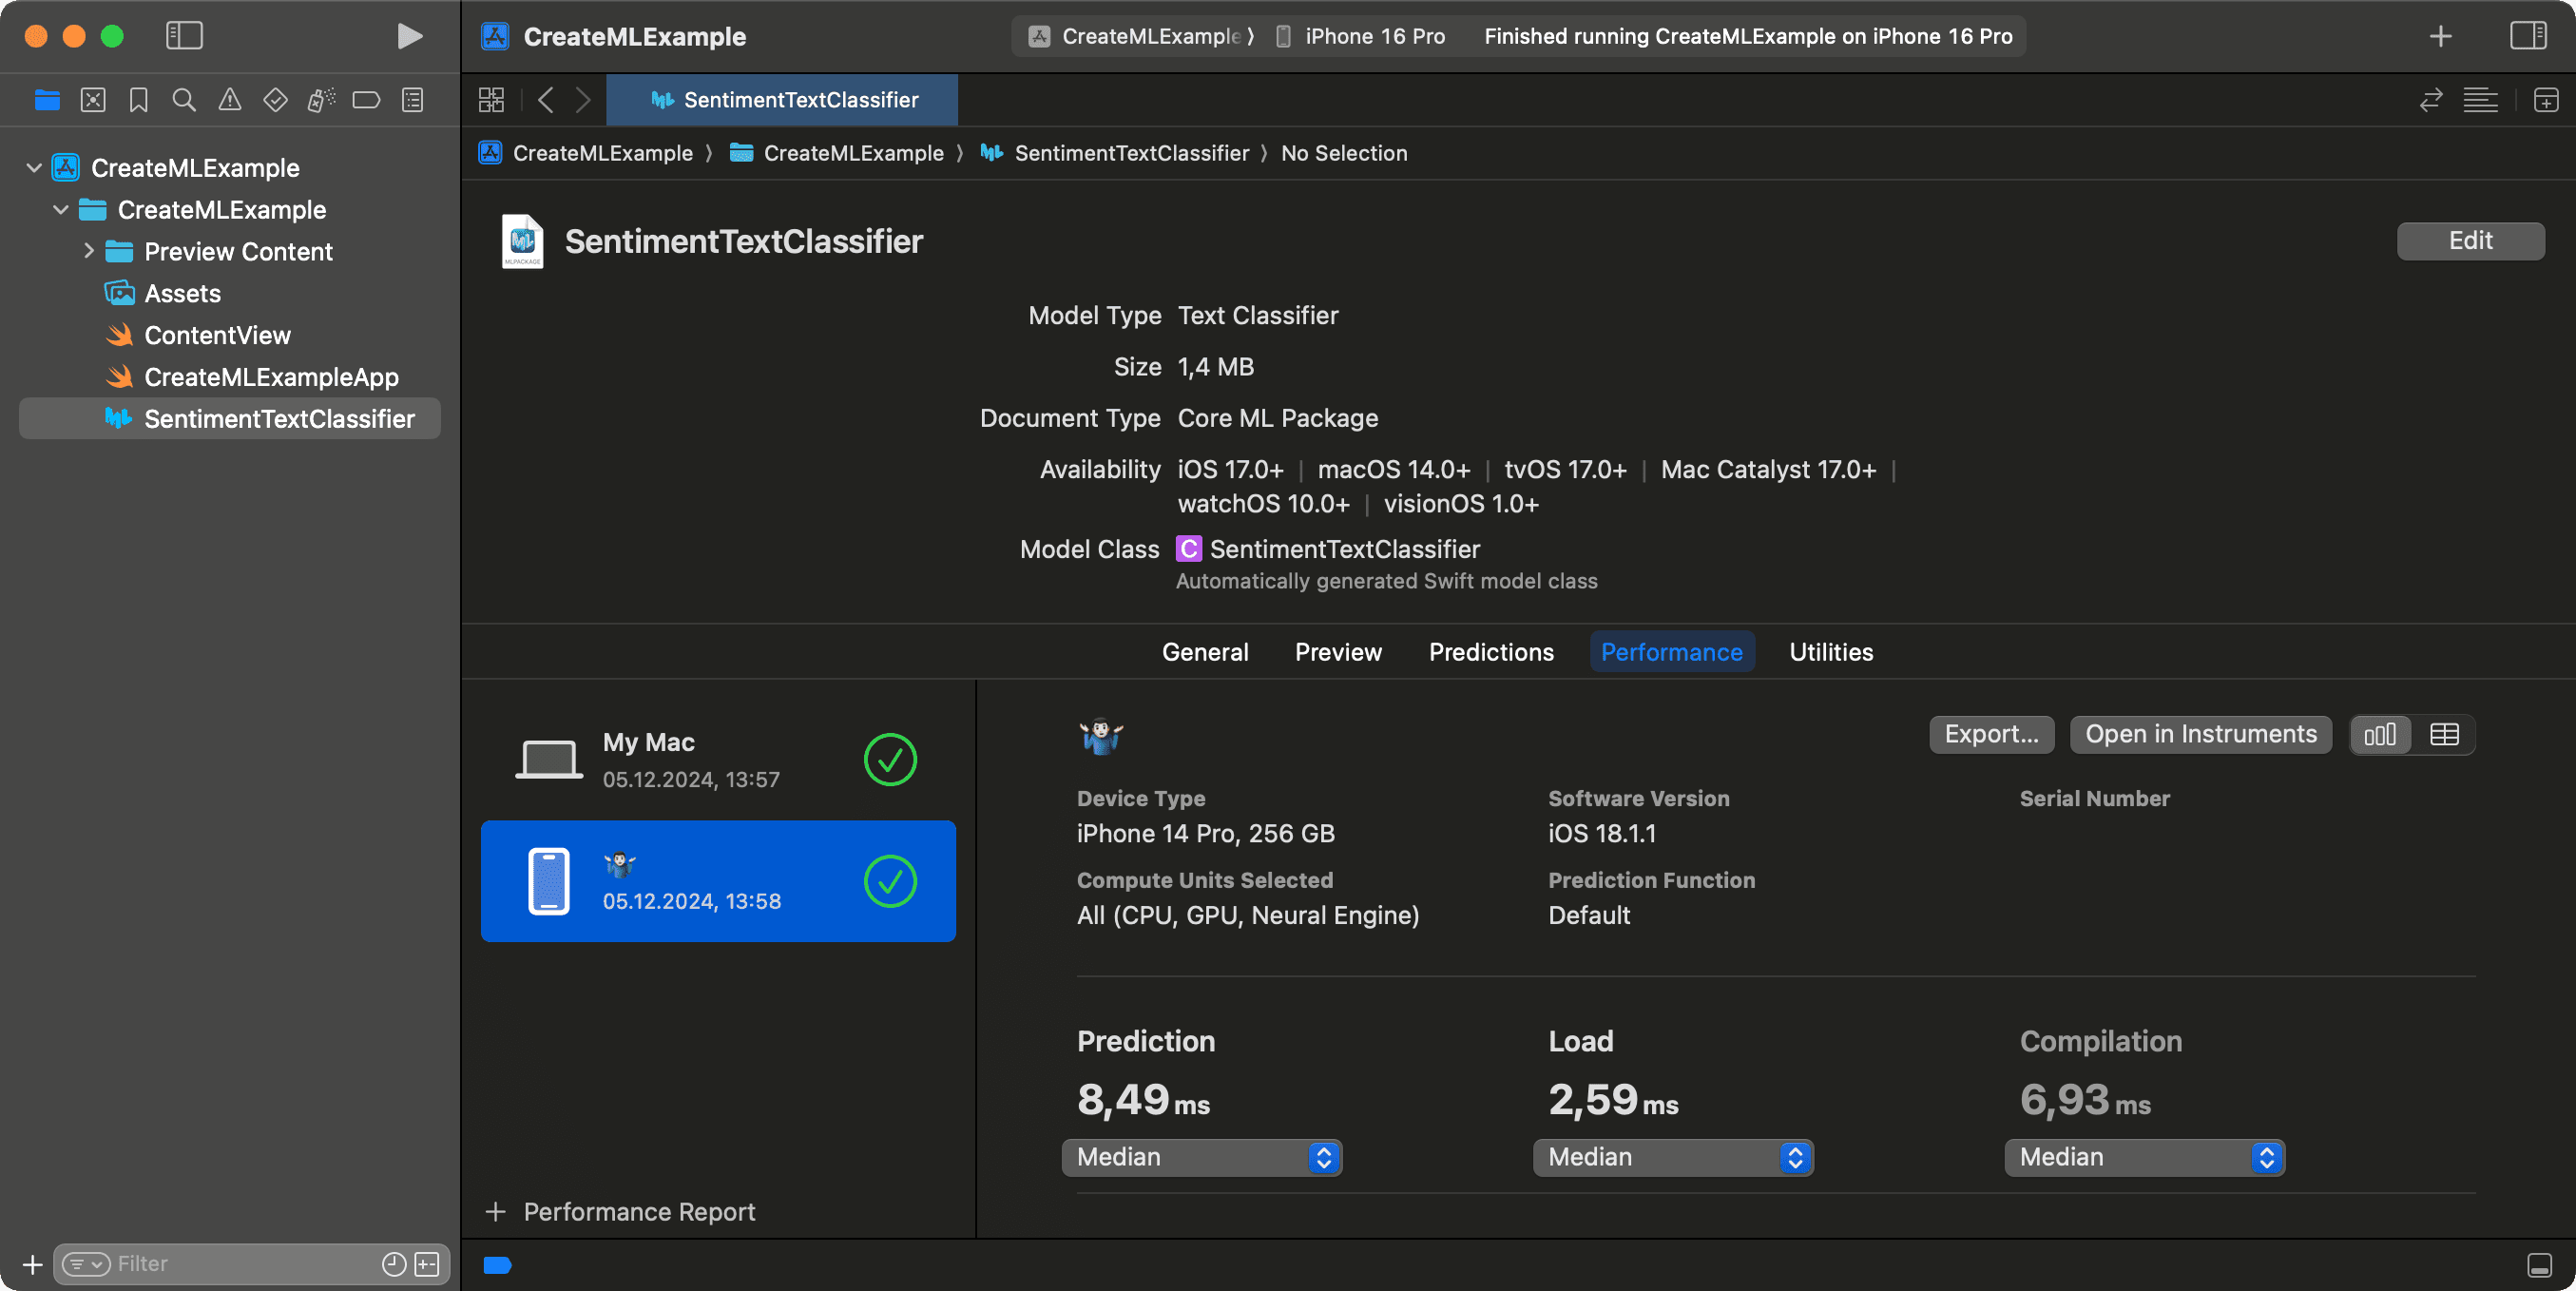
Performance reports may be exported in .mlperf format. It's a JSON file with a specific structure. You can use it for further analysis or sharing with your team.
Conclusion
Create ML is easy to use and doesn't require deep knowledge in machine learning. The only thing you need is a good dataset. It's a good start point for creating machine learning models for your apps. In a real-world scenario, you may need to improve the model with more data. Luckily, you're not limited to use UI interface, you can use CoreML framework and train updated models with Swift code. Even more, you can use popular ML frameworks like TensorFlow or PyTorch and convert models to Core ML format with Core ML Tools.
That was the last post in the series about text analysis. I hope you enjoyed it and learned something new. As usual you can find the final project with the dataset and the model on Github. Feel free to ask questions or share your feedback on X. Thanks for reading!
References
- Explore Natural Language multilingual models from WWDC23
- Creating a text classifier model by Apple
- Open Sourcing BERT by Google
- Core ML Tools documentation